You can create new plants either by collecting, drying and sowing seeds or by taking a cutting and encouraging it to take root. Cuttings provide the most reliable form of propagation as the plant will be an exact match of the parent. A seed grown plant, on the other hand, may vary in size, shape or flower colour from its parent. In fact named cultivars can only be propagated by cuttings.
This article concentrates on semi-hardwood cuttings like Callistemon, Azalea, Camelia, Daphne, Jasmin, Leptospermum, Magnolia, Rhododendron etc. and other evergreens - the techniques vary for other types of cutting like soft-tip or leaf.
The Right Raw Materials:
A successful cutting needs the right kind of specimen that has been collected early in the day to ensure its at its maximum turgidity (high fluid content) Firm, current season growth is best, not too green and not too woody.
Test it by bending it through 70-80 degrees - if its springs back its good, if it snaps or stays floppy its not ideal.
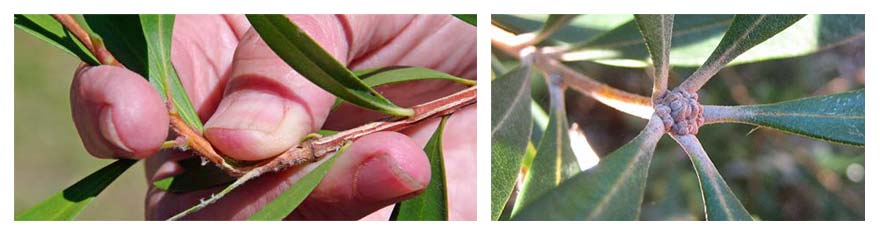
With semi-hardwood cuttings the tip should also have a terminal bud that hasn’t started to open.
Timing:
You can generally take cuttings at any time of the year but they will "take" much better in the warmer months e.g. late spring or early autumn. Conifers are there exception which are best propagated in winter, as are Pittosporum.
Equipment:
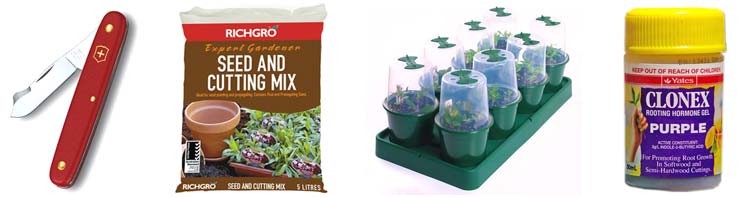
A sharp knife, blade or secatuer is vital, a bag of potting mix (made up of 40% coarse sand, 40% perlite and 20% peat), pots to plant them in and some rooting hormone powder or gel. It will also be important to maintain temperature and humidity around the cuttings so a transparent housing for the pots is good - unless you have a greenhouse of course.
Collecting your Cuttings:
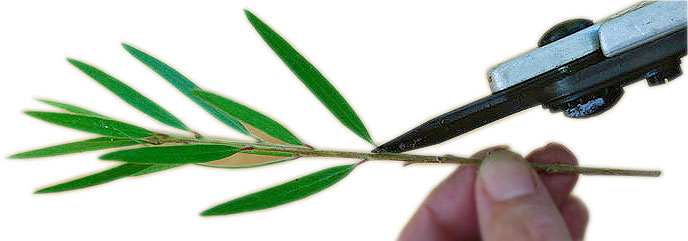
Make cuttings around 75-100mm long and cut directly below a leaf junction or node then trim off two thirds of the leaves. Alternatively you can tear a cutting off the parent plant leaving a heel, which is then trimmed. Take plenty of cuttings - some may not ‘take' so its always best to propagate more than you need.
If you can’t collect and complete the potting in one go then it is possible to collect cuttings and keep them in the fridge until you are ready. Just wrap them in wet newspaper and place in a plastic bag in the fridge overnight.
 Preparing Cuttings for Planting:
Make sure your knife blade is sterilised under boiling water before you start to avoid transmission of disease.
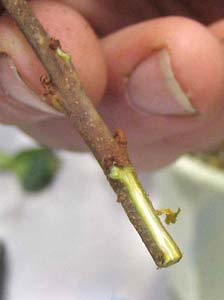
Make a 20cm wound at the base of each stem by scraping the blade towards you, this tells the plant to send healing hormones to that location and also helps to promote root formation.
Then to give the cutting the best chance of ‘taking’, dip the toe into some rooting hormone gel. Always pour some out first into a saucer, do not dip the cutting into the pot as it may taint the rest of the gel.
Rooting Gel WARNING:
Be VERY CAREFUL with rooting products as they contain hormones which will affect humans if ingested so wash hands thoroughly after use. It is also important to care for the rooting product properly by keeping it in a dry container in a cool, dark environment - otherwise it will loose its efficacy.
Planting the Cutting:
Fill a pot with a potting mix and make a hole around 5 cms deep with a pencil or dibber, carefully place the stem in the hole, fill it with potting mix and firm down. Do not push the stem straight into the potting mix as it will wipe off the rooting gel on the way.

N.B. If you are using larger pots then it’s a good idea to plant more than one cutting per pot in case some don't take - but if they do you can separate them later and re-pot them individually. If you are using a proprietary mini-greenhouse as illustrated below then just one cutting per mini-pot is OK.
Now you need to water the cuttings well and let them drain before covering to place in a light environment that is free of draughts and has as reasonably steady temperature. Ensure that the light is indirect so as to not cook your cuttings on hot days.

If you haven’t got a mini-greenhouse then a hooped wire (coat hanger) arch covered with a sandwich bag that is secured with a rubber band will also do as long as there are some breather holes in the bag.
Both of these enclosures keep the humidity high and maintain a good moisture content in the soil as it drips off of the canopy above the plant.
Nurturing Your Cuttings:
Keep the soil moist - not wet and the foliage cool. A spray of water may be all that’s required each day with a more thorough soaking only once a week. But beware of fungal attacks - which are more likely in humid conditions (hence the airholes!!)
"Taking" or Rooting:
 Most cuttings will form roots within 4 - 8 weeks in warm climates though they will take longer in winter. Some cuttings will remain green and healthy looking for many many months without doing anything new - fret not. If you are patient enough even the most tardy cutting will eventually sprout roots and then new leaf growth.
I remember taking a cutting from a native shrub (Metsideros excelsus variegata - New Zealand Christmas Tree) that had been uprooted by a bulldozer. Determined to save it, I took a cutting (no knife available so I broke off a long branch and did the good clean cut later) and did all of the above. It took over a year to "take" but within two years it has grown to a healthy 2 metre high specimen.
Hardening Off:
When you see new growth you'll know that the plant has taken, but it may not be ready to "Go it alone". Hardening off is equivalent to weaning - it entails leaving the plastic cover off for increasing intervals and placing it in direct sunlight for increasing periods - ensuring that it is well watered first.
Planting Out:
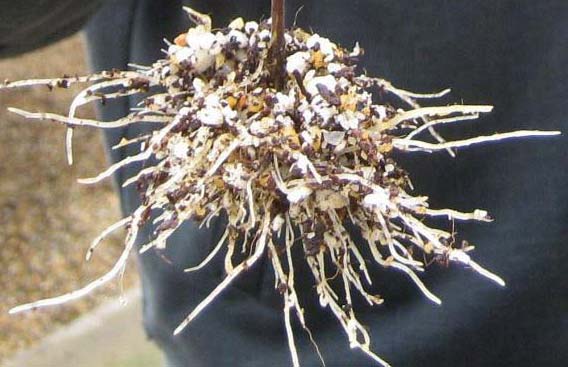
 Finally give it a bit longer in an open pot before planting out into open ground. This could be a few weeks or a few months, depending on how quickly the plant will grow roots. To see if its ready just up-end the pot and tap it out into your hand. If there is an obvious and plentiful rootball then its ready - but don't let it get pot-bound.
If you live in a windy locality or you can't guarantee to keep it well watered then 'The Water Tube' is a good idea to protect new plants while keeping up a steady supply of moisture to the roots.
Its a simple tube of plastic but this one has two walls so that water can be added in between the layers. then with a simple coiled dripped inserted at the base a slow and steady drip will keep roots moist to ensure the plant gets the best possible start in life. It will also stops the plant being buffeted by strong winds while it is setting deeper roots.
N.B. The Water Tube is available for purchase from the GardensOnline shop - just click on the link to go directly there.